Guide, 11 min
Cooking on stainless without sticking: the preheat, the fat and the fond
The water test, the two minutes that decide everything, and why the fond is the point rather than the mistake.
A stainless pan is not a nonstick pan. It does not pretend to be one. But a stainless pan that grabs your food is not a design flaw. It is a signal. Usually the signal says the pan was not hot enough, or the fat went in at the wrong moment, or the food was nudged before it was ready to let go.
The VEDNHOL kitchen builds stainless pans that reward technique. The Tri-Ply line is PFAS, PFOA and PTFE free. No coating stands between you and the heat. What you get instead is a surface that sears hard, builds a proper fond, and releases protein cleanly when the conditions are right. This guide covers the three steps that make stainless predictable: the preheat, the fat, and the fond.
The Leidenfrost Effect and Why Your Pan Needs to Be Hot
Drop a single droplet of water into a cold stainless pan and it sits there. It spreads a little and evaporates slowly. Heat the same pan dry over medium flame for two minutes. Flick another droplet in. This time the water beads into a tight sphere and skates across the surface on a cushion of its own steam. That is the Leidenfrost point.
What happens at the surface matters. Steel is porous at a microscopic scale. When the pan is cold, those pores grab whatever touches them. As the metal heats, it expands and the pores close. At the Leidenfrost point the surface is smooth enough that a water droplet cannot make contact. Protein behaves the same way. A chicken breast laid on a pan at 380 degrees Fahrenheit meets a surface it cannot grip. It sears on contact, forms a crust, and releases.
The test is simple. Heat the pan dry for ninety seconds to two minutes on medium. Flick a teaspoon of water in. If the water breaks into beads that glide, the pan is ready. If the water sizzles and evaporates in place, wait another thirty seconds. Add the fat only after the water test passes.
Why a Cold Pan Grabs Protein
Cold metal contracts. The microscopic valleys in the steel are open. When egg white or fish flesh hits a cold pan, it flows into those valleys and locks in place. The bond forms before any crust develops. Trying to lift it early tears the food.
The same thing happens with a pan that is warm but not hot enough. Proteins begin to denature at around 140 degrees Fahrenheit. Below that temperature they simply stick. Between 140 and the Leidenfrost point they stick and then begin to cook. Above the Leidenfrost point they sear immediately. The outer layer of protein sets before it can sink into the steel.
Timing the fat matters almost as much as the heat. Oil added to a cold pan heats gradually with the metal. It breaks down before the pan reaches searing temperature. Oil added to a pan that already passed the water test heats in seconds. It shimmers immediately. That shimmer is the cue to add the food.
Cook all food to these minimum internal temperatures, as measured with a food thermometer, before removing food from the heat source.
Fat: How Much, What Kind, and When
A tablespoon is usually enough. For a 12-inch skillet, coat the bottom with a thin layer. The oil should move when you tilt the pan but not pool. Too much fat and you fry rather than sear. Too little and the food finds bare steel.
Butter alone burns at 350 degrees Fahrenheit, which is below the Leidenfrost point. Clarified butter or ghee works because the milk solids are gone. A neutral oil with a high smoke point is the simplest choice. Avocado oil, grapeseed oil, or light olive oil all handle the heat. A combination works too. A teaspoon of butter added to hot oil right before the food goes in gives you the butter flavor without the smoke.
The sequence is fixed. Heat the pan dry. Test with water. Add the oil and swirl. Wait ten seconds for the oil to shimmer. Add the food and do not touch it for at least two minutes. The food will tell you when it is ready to release. A chicken thigh that still sticks is not done on that side. Give it another minute and try again gently. It will lift when the crust is set.
Stuck Versus Fond: The Difference That Matters
Stuck food is a problem. Fond is an ingredient. The difference is heat control.
Fond is the brown layer of caramelized protein and sugars left on the pan after a proper sear. It is dry, dark, and concentrated. It lifts easily with a splash of liquid and a wooden spoon. It becomes the base of a pan sauce in under a minute.
Stuck food is black, bitter, and bonded to the steel. It happens when the heat is too high, the food sat too long, or the pan ran dry. No amount of deglazing will save it. The only fix is to clean the pan and start again.
The line between them is attention. A stainless pan on medium heat holds temperature steadily. The Tri-Ply construction carries heat evenly across the base and up the sides. Once the food goes in, lowering the heat slightly keeps the fond from burning. A pan sauce takes about three minutes from start to finish. Shallots, a splash of stock or wine, a knob of cold butter off the heat. The fond dissolves into the liquid and the sauce thickens as it reduces.
Eggs on Stainless: A Different Set of Rules
Eggs are the hardest test for stainless. They are mostly water and protein. They set at a low temperature. They stick to almost anything.
The technique that works for a steak does not work for a fried egg. A pan hot enough to pass the water test will burn butter instantly and crisp the egg white before the yolk warms through. For eggs, the heat comes down.
Medium-low. Butter in a cold pan, then heat together until the butter foams and the foam just begins to subside. The pan is now around 300 degrees Fahrenheit.
The egg slides in and sets gently. A thin spatula releases it from the pan after the white is opaque.
Scrambled eggs need even less heat. Low and slow, with constant movement. A silicone spatula keeps the curds small and soft. The pan never gets hot enough to form a crust. The eggs finish creamy, not dry.
Cleaning Burnt Stainless Without Damaging the Steel
A burnt pan is not ruined. Stainless steel tolerates more abuse than any coated pan ever could. The fix is usually already in the kitchen.
Fill the pan with enough water to cover the burnt area. Add a tablespoon of baking soda. Bring it to a simmer for ten minutes. The alkaline water loosens the carbonized food. Pour the water out and scrub with a paste of baking soda and a few drops of water. A non-scratch scrub pad or a wooden spatula does the rest.
For heavier burns, a paste of baking soda and white vinegar works faster. The fizzing reaction lifts the burnt layer mechanically. Let it sit for fifteen minutes, then scrub. Bar Keepers Friend, a powdered oxalic acid cleaner, removes the last shadow of discoloration. Rinse thoroughly and dry. The pan looks new.
Do not use steel wool. It scratches the surface and creates new places for food to grab next time. Do not put a hot pan under cold water. Thermal shock can warp the base. A warped pan will never sit flat on an induction hob again. Let the pan cool on its own before washing.
PFAS are widely used, long lasting chemicals, components of which break down very slowly over time.
When the Food Is the Problem and When the Technique Is
Some foods stick no matter what. Wet fish skin, lean pork, and starchy vegetables all present challenges. The problem is not always the cook.
Fish with the skin on needs the skin dried thoroughly with paper towel before it hits the pan. Wet skin steams instead of searing. The pan should be hot enough to pass the water test. Oil in, fish in skin-side down, and press gently with a spatula for the first ten seconds so the skin makes full contact. Do not move it for three minutes. The skin crisps and releases.
Lean pork chops with no fat cap have nothing to render. A thin coating of oil on the meat itself helps more than extra oil in the pan. A marinade with a little sugar encourages browning. The same heat rules apply. Hot pan, oil shimmering, food in, hands off.
Starchy vegetables like potato slices release water as they cook. That water drops the pan temperature and creates a sticky layer of starch. Parboiling the potatoes first, then drying them thoroughly, solves most of the problem. A well-oiled pan and medium heat do the rest.
The technique is the problem when the pan is crowded. Two chicken breasts in a 12-inch pan is fine. Four is not. The food drops the pan temperature too far. Steam builds. The meat poaches in its own moisture instead of searing. The crust never forms. Give each piece room. Cook in batches if the pan is too small.
How to choose a pan size that fits your cooking
Who Should Not Buy Stainless Cookware
Stainless is not for everyone. It asks more of the cook than nonstick or ceramic.
If you want a pan you can heat empty, crack an egg into, and walk away from, stainless is the wrong choice. If the idea of learning a water test feels like a chore, stainless will frustrate you. If you cook mostly delicate fish, crepes, or scrambled eggs and have no interest in building a pan sauce, a nonstick pan will serve you better.
Stainless rewards attention. It rewards the cook who enjoys the process as much as the result. The fond, the deglaze, the sauce that comes together in the same pan the meat was seared in. Those are the reasons to choose stainless. If those sound like extra steps you would rather skip, the VEDNHOL pieces includes other options.
Titanium, stainless or nonstick: which surface matches how you actually cook
The Tri-Ply Stainless Lineup in Practice
| Piece | Diameter | Best for | Oven safe |
|---|---|---|---|
| 10-inch skillet | 10" | Eggs, single portions, side dishes | Yes |
| 12-inch skillet | 12" | Two proteins, pan sauces, one-pan meals | Yes |
| 7 QT braiser | 12" wide, 7 QT | Braises, shallow frying, family meals | Yes |
| Skillet set with lids | 10" and 12" | The full stainless starter kit | Yes |
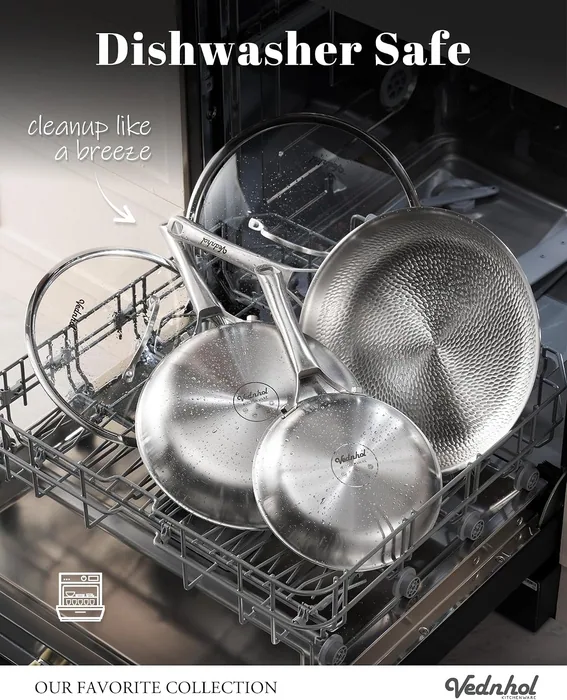
The Tri-Ply construction puts an aluminum core between two layers of stainless steel. Heat moves fast and spreads evenly. The pan responds to changes in burner temperature within seconds. The handles stay cool on the stovetop. Every piece in the line is dishwasher safe.
| What you are cooking | Heat level | Visual cue | Approximate pan temperature |
|---|---|---|---|
| Steak, lamb chops | Medium-high | Oil shimmers and ripples | 400-450°F |
| Chicken breast, pork chop | Medium | Oil shimmers, no smoke | 350-400°F |
| Fish fillet, skin-on | Medium | Oil moves easily, surface glistens | 350-380°F |
| Eggs, scrambled or fried | Medium-low | Butter foams, foam subsides | 275-325°F |
| Pan sauce from fond | Medium | Liquid simmers gently | 200-250°F |
These temperatures are approximate. Every stovetop behaves differently. Gas responds faster than electric. Induction responds fastest of all. The water test is the constant. Learn how long your pan takes on your burner and the rest follows.
Building a Pan Sauce from the Fond
A pan sauce turns the residue of cooking into the best thing on the plate. The pan comes off the heat with the fond still in it. The protein rests on a board. The pan goes back on medium heat.
Aromatics first. Minced shallot or garlic, a sprig of thyme. Thirty seconds in the residual fat left in the pan. Then a liquid. Half a cup of chicken stock, white wine, or vermouth. The liquid hits the hot pan and bubbles immediately. A wooden spoon scrapes the fond off the bottom. The brown bits dissolve into the liquid. The sauce reduces by half, about two minutes.
Off the heat. A tablespoon of cold butter stirred in until it melts and the sauce turns glossy. Salt and a grind of pepper. The sauce goes over the rested protein. The whole thing takes less time than setting the table.
| Protein | Aromatic | Liquid | Finish |
|---|---|---|---|
| Chicken breast | Shallot, thyme | White wine, chicken stock | Butter, lemon juice |
| Pork chop | Garlic, rosemary | Vermouth, chicken stock | Butter, Dijon mustard |
| Salmon fillet | Shallot, dill | White wine, splash of water | Butter, capers |
| Steak | Shallot | Red wine, beef stock | Butter, black pepper |
Stainless and the VEDNHOL kitchen Kitchen
The Tri-Ply line sits alongside the Titanium Hammered Pro range in the VEDNHOL team. Both are PFAS, PFOA and PTFE free. Both work on every heat source including induction. The difference is the cooking experience. Titanium brings a darker, textured surface that seasons over time and releases food with less fat. Stainless brings precision. It shows you exactly what is happening at the surface. It teaches you to read the pan.
The VEDNHOL range designed the Tri-Ply pieces for cooks who want that feedback. The aluminum core carries heat across the base and up the walls. The stainless interior takes a sear and builds a fond that nonstick surfaces never will. The collection starts with a single skillet and grows into a full set with lids and a braiser deep enough for a whole chicken.
The range is built for a kitchen where technique matters. Where the water test is second nature. Where the fond becomes the sauce and the pan goes from stovetop to oven and back without a second thought. That is the VEDNHOL lineup with stainless.